
Using aliases in Outlook makes managing your different email accounts, phone numbers, Skype names, and other contact information a whole lot easier than would be on its own.
Aliases provide access to the same inbox, the same contact list come in the same account settings as the primary alias – allowing you to leverage all of the tools you need at the same time without having to jump from one account to another.
Here’s how to create, use, and remove or modify Hotmail aliases with Outlook.
Creating a new Outlook Alias
The first thing you’ll have to do is sign into your Microsoft account and click on the “Your Info” tab, right next to the Home section.
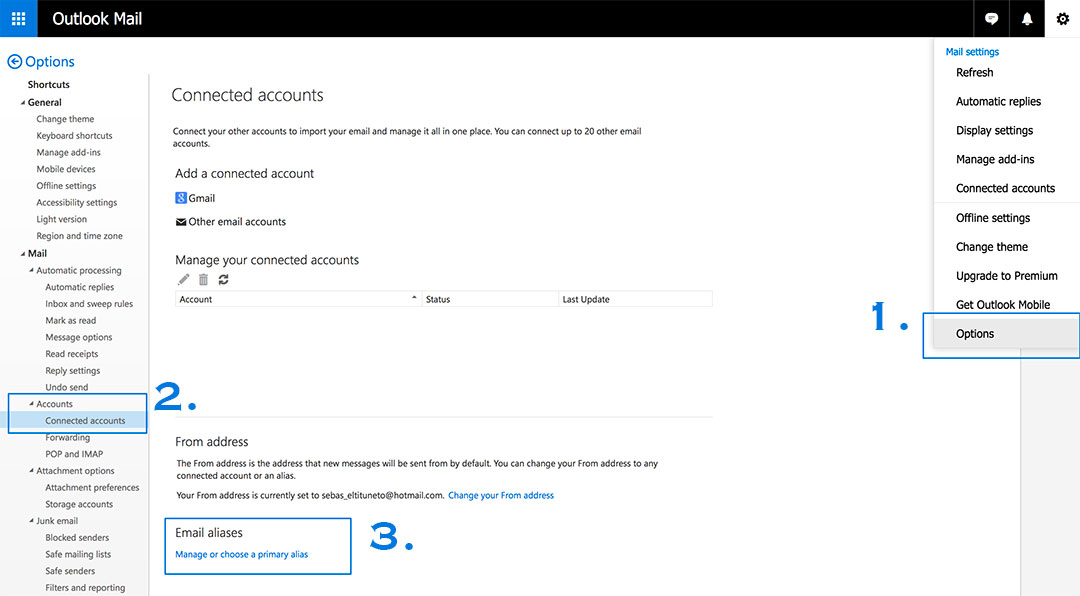
From there, dive into the “Manage your sign in email address” settings. This is going to give you the option to “add email aliases” – but you’ll have the opportunity to add other types of aliases as well (as we highlighted above).
If you don’t find where, just click here
You can use these steps to add just as aliases as you need to but will also be able to use this alias creation process to determine which one is your “Primary” alias. The primary alias is going to be the driver of all the resources that you’re able to use in Outlook.
While you’ll have the opportunity to change your primary alias as need be, it’s important to remember you won’t be able to do so any more than twice a week.
Clicking here you will be able to manage all your available alias or to create / delete the one you want
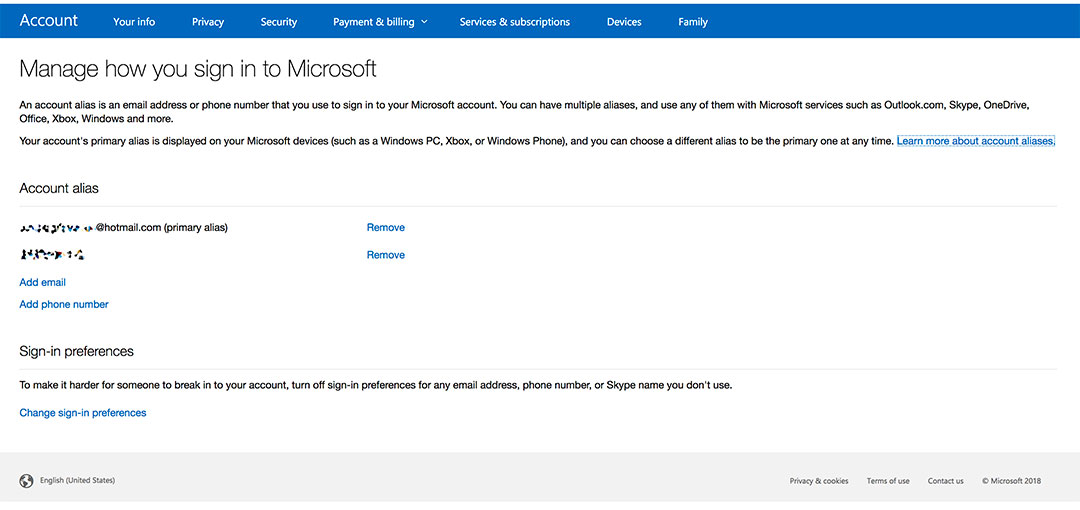
It’s also important to know that Outlook only allows you to add 10 new aliases each year. You’ll have the opportunity to delete older and unused aliases within the year to “free up space”, but you’ll only ever get 10 new ones to take advantage of.
Using your Outlook Aliases
Using your new Outlook alias is simple and straightforward.
All you have to do is click your account name (right up near the top left corner of each Outlook page) and then select the alias that you want to use in the drop-down box.
You’ll also have the chance to determine which alias you use as the “Default Sender” when you fire out emails. Those settings are going to be contained within the “Manage Your Accounts” section of the “Settings” page.
Jumping around from one alias to the next is effortless. All you have to do is click the drop-down box, choose the alias you want to go to, and then bounce around from one alias to another without any limitations whatsoever.
Removing your Outlook Alias
Removing your Outlook alias, Hotmail alias, or Live.com alias is a little bit trickier than most people realize.
You’ll have to dive deeper into the Settings section, into the Manage Your Account setting, and find the “Removed” section of the Manage Your Aliases area.
It’s important to remember that once you delete an alias it’s going to be deleted forever. You’ll have the opportunity to re-add it later on (if you haven’t used all 10 of your available alias slots), but you’ll have to reconfigure Outlook all over again if you decide to add this alias back into the mix later down the line.