Add Outlook Signature – A Step-By-Step Guide
Whether you’re an entrepreneur, webmaster or an ordinary citizen, it is highly likely that you own an email address. Your email gives you the ability to communicate efficiently with your friends, family members, and work associates. If you’re noticed, some people have attached a signature to each of their emails. This is not something that needs to be done manually each and every time you send a new email. The Outlook email service offers a fast and convenient way to add a signature to each of your emails. You’ll learn how to add your own email signature to your Outlook email address below.
Reasons To Add A Signature
Adding an Outlook signature to your email can be very beneficial. In fact, you do not need to be an entrepreneur or webmaster to benefit from an email signature. By adding a line to the bottom of your emails, you will be able to achieve many goals. You can use the signature as a way to express yourself and make a political statement. On the other hand, business people can use the signature to display their contact information. As a webmaster, the Outlook signature offers a convenient way to tell others about your website or blog.
Truly, this feature can be helpful for the email sender, as well as the receiver. Even better is the fact that Microsoft has made it nearly effortless to add a signature to their Outlook service.
Signing In
In order to access your account’s settings, you will first need to login to the Outlook service. This can be down by utilizing Microsoft’s desktop application or you can visit the Outlook website directly. The process of setting up a signature will deviate slightly from Outlook to the web-based application. Once you’ve signed in, you should proceed to the appropriate section below.
Adding A Signature In Outlook
If you use the Outlook application for Windows 10, you will need to click on “New Email” to add a signature. Then, click on the “Message” tab. There, you will be able to find a “Signature” button in the “Include” category. Click on the Signature button and you will be presented with a new screen. At this point, you can compose a new signature and choose a default signature for your email account. Once you’ve finished and everything looks good, you should click the Ok button in the bottom right hand corner.
Anytime you wish to alter the signature or create Outlook signature, you should follow this same procedure.
Adding A Signature To The Outlook Mail Web App
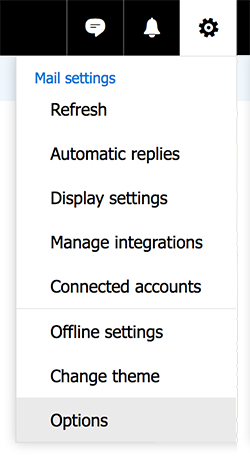
Many people will use Outlook.com to read and compose new emails. If you do so, you will need to access your account and venture to your Options, before you can add a new signature.

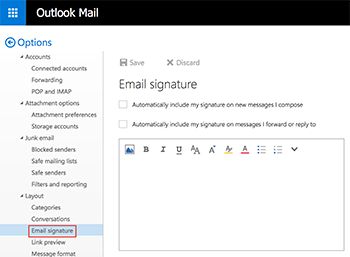
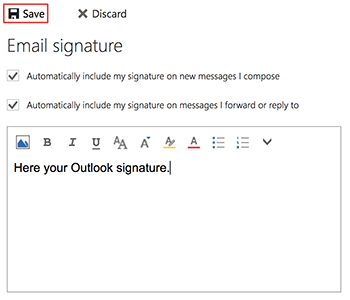
Once you’ve found your Options, you will want to click on “Layout” and then “Email signature”. This will provide you with a text area, where you can construct a new signature. You can also select two boxes to have the signature attached to all of your messages.

Once you’ve finished composing your new signature, you should click the “Save” button above the text area.
